
Setting up Git with Android Studio
- Irfan S

- Nov 27, 2019
- 3 min read
Git is the de-facto standard for Version Control in any and all software. It was built by Linus Torvalds, the creator of Linux.
In this post, we will be discussing how you can link your Android Studio to your GitHub account and successfully push your mobile application online, and making it available for everyone to view!
We recommend and advocate developing on Linux, as it's open-source and the primary environment for programming in all major companies around the world, hence our guide will focus on setting up Git for Android Studio on Ubuntu/Linux.
Prerequisites:
- Working Android Studio environment.
Step 1: Install Git Git is the software which allows you to manage and version your code, and is the backbone for all GitHub projects. Here's how to install it:
- Ubuntu
Run this code on a terminal window:
$ sudo apt update
$ sudo apt install git
The line below is used to check if Git has been successfully setup on your system.
$ git --version
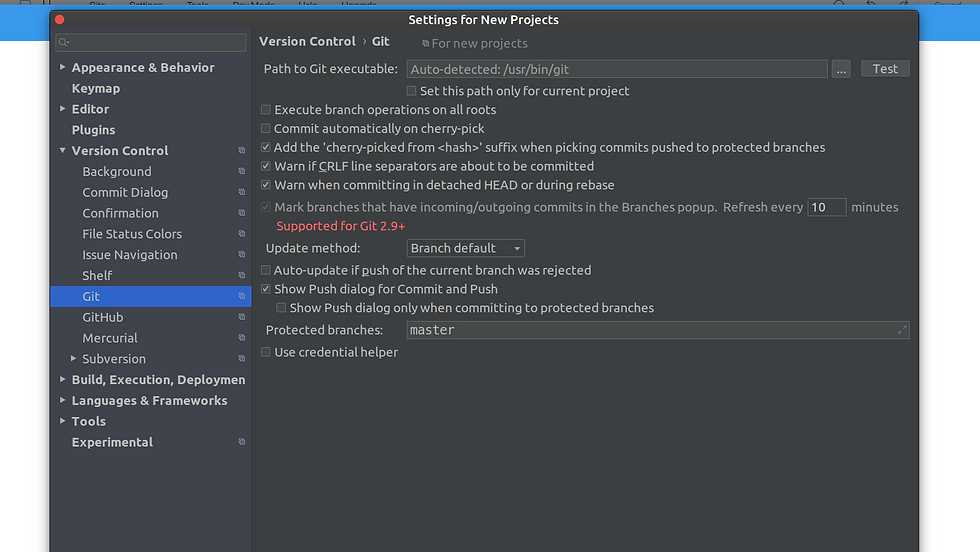
Step 2: Link the Git executable to Android Studio and your GitHub account.
Once the installation is done, start up your Android Studio. Follow the visual guide below.

Now head over to the GitHub section. Click the '+' icon, and the following dialog will show up. Enter your GitHub email and password, and you're set.

Step 3: Create a repository on GitHub
Head over to github.com, and create a new empty repository. Do not initialize a README.md file unless you know how git works in order to avoid merge conflicts.
Based on your need, it can be public or private.

After creating your repository, copy the following link.

This link will be used to link your local git versioning to GitHub. Now head back to your Android Studio Project.
Step 4: Initialize Git on your project
Head over to VCS->Import into Version Control->Create Git Repository.
The default location will already be selected, all you gotta do is click and confirm.

After initializing your repo, you will have to commit your project. Commit is analogous to saving your program's state. This acts as a 'snapshot' of your code , and is used for versioning.
In the 'Commit' dialog , you should select all of your 'Unversioned' files. These files have not been added to the Git repo yet, and since this is a new Git repo, all your files will be unversioned initially.
Give your commit a name in the 'Message' box, which will help you identify what work you've done on this particular commit.
And hit 'Commit'

Step 4: Setup your remotes and push.
Head over to VCS->Checkout from Version Control->Remotes. On clicking this, the following dialog will appear.

Enter the URL that you copied from your GitHub repository here, and hit 'OK'.

You are now ready to push your code to GitHub.
Head over to 'Push' .

The following dialog opens up, your remote will be displayed, with the name you've given it. By default, it is always origin:master. Click on Push.

Step 5: Check your push status and you're done!
If your push is successful, the following dialog will show up on the bottom right of your screen.

Now head over to your GitHub project and you will find your code online!

And you've got your first project live on GitHub!
If you've got any additional queries, feel free to leave a comment below, or if you're from PESU - ECC, feel free to reach out to any of the core team members here at onCreate().

Comments